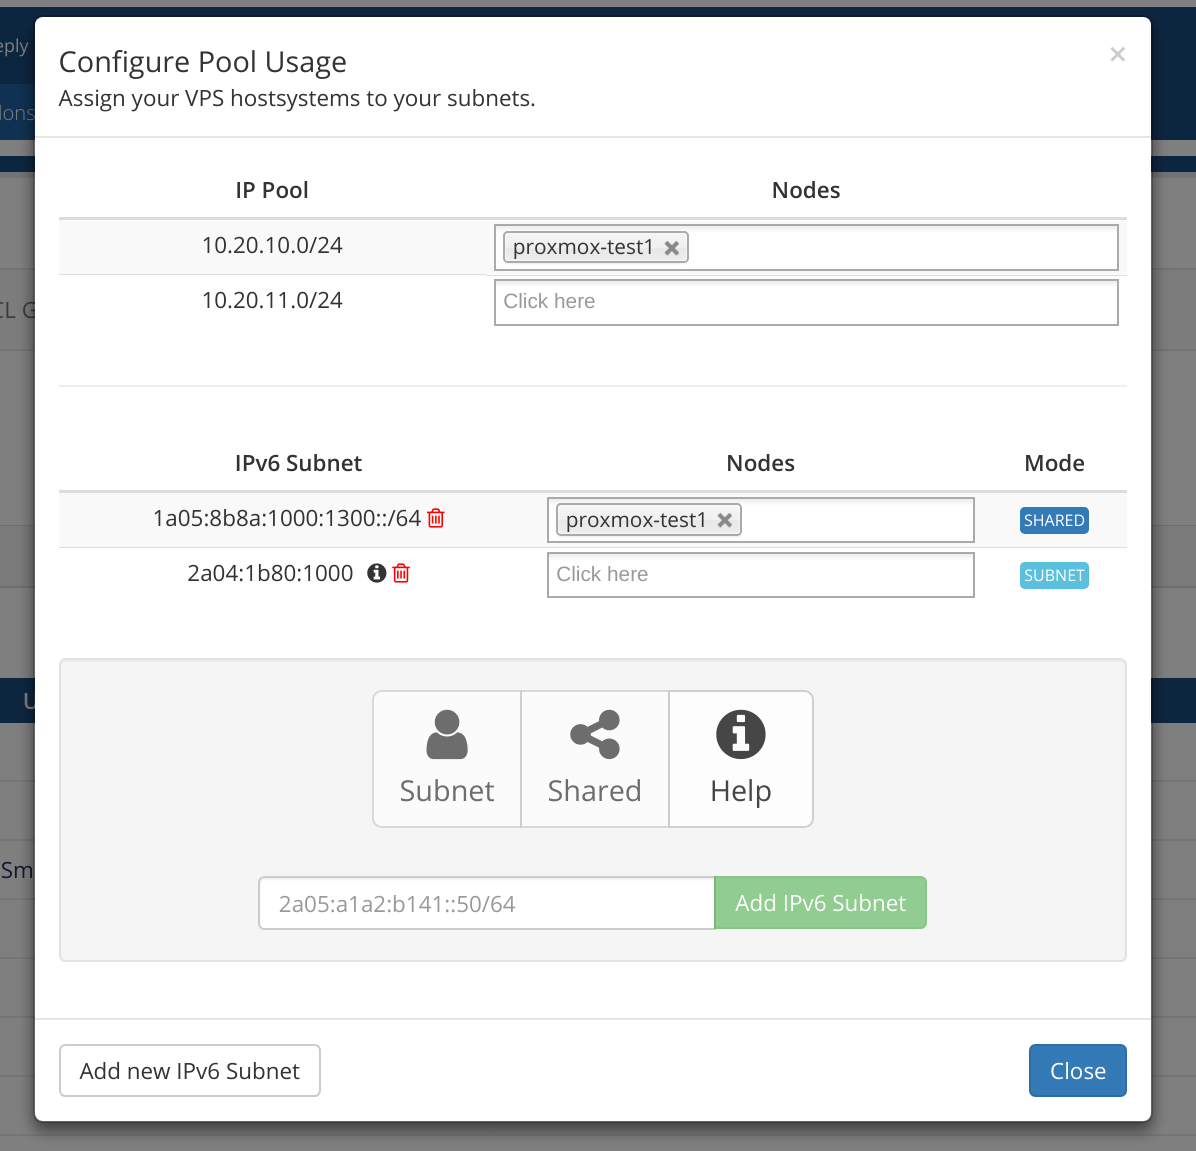
The module can automatically assign IPv6 addresses to virtual servers upon creation by WHMCS.
Add new IPv6 space
To add a new IPv6 space, open the "IP Manager" page and click on "Configure pool". Then click the button "Add new IPv6 Subnet", a new sub-page will appear where you can give in your IPv6 details.
The page will automatically detect on your input if you want to use the subnet mode or the shared mode.
It does also inform you if your input does not look like a valid IPv6 space.
Do not forget to add the subnets at NOC-PS. Click on the information icon next to the subnet to see how many subnets are matching your pattern.
Subnet Mode
Subnets, which starts with the given string, will be assigned to new virtual servers.
Example: "2a05:1b2a:2bc1:1" matches subnets like:
- 2a05:1b2a:2bc1:1000::/64
- 2a05:1b2a:2bc1:1001::/64
- 2a05:1b2a:2bc1:1ac1::/64
The module will query NOC-PS to get the possible subnets which matches your string.
Shared Mode
Enter a complete subnet with CIDR (/64, etc.) to mark the subnet as shared. Shared subnets will be assigned to multiple virtual servers. Every virtual server receives a single IPv6 address from this subnet.
Example: "2a05:8b8a:1000:1300::/64" assigns single IPv6 addresses to virtual servers:
- 2a05:8b8a:1000:1300::2/64
- 2a05:8b8a:1000:1300::3/64
- etc.
Assignment Checks
The module automatically checks which IPv6 addresses or subnets are already in use at NOC-PS and will only use available addresses.
- If you use the ipv6 shared mode, the module will check which IPv6 address is available next.
- If you use the subnet mode, the module will check which subnet is free (and matches your subnet string) and assign it. it will also automatically assign an IPv6 address from this subnet.
